GitOps Import with ArgoCD
This guide walks through a complete working example of importing GitOps-managed applications into ConfigHub using ArgoCD. It uses a local Kubernetes cluster to demonstrate the full setup then import into the Confighub UI.
Requirements
How It Works
- ArgoCD continuously syncs your Git repo to the cluster — your repo structure is your deployment config
- ConfigHub Worker runs inside the cluster, reads ArgoCD application state, and reports it back to ConfigHub
- ConfigHub uses that data to let you discover, import, and manage your apps through the UI
This can also be achieved via CLI using cub gitops discover, cub gitops import, and cub gitops cleanup. When a single worker hosts the discovery, renderer, and OCI bridges, one target is sufficient for all three steps:
cub gitops discover --space my-space my-k8s-target
cub gitops import --space my-space my-k8s-target
For the full end-to-end flow — what discover and import do in ConfigHub, how rendered manifests are stored, and how re-renders preserve modifications — see Render manifests from DRY formats.
1. Create a Local Cluster
bin/create-cluster
Creates a Kind (Kubernetes in Docker) cluster named gitops-import. The kubeconfig is saved to var/gitops-import.kubeconfig — isolated from your global ~/.kube/config.
2. Install ArgoCD
bin/install-argocd
This installs ArgoCD into the cluster and configures it for local access:
- Installs ArgoCD from the official stable manifests
- Exposes the ArgoCD UI at http://localhost:9080 (no
port-forwardneeded) - Pre-provisions a
confighub-workerservice account in ArgoCD with read-only access to applications — this is the account ConfigHub uses to query ArgoCD
The admin password is printed at the end and saved to var/argocd-admin-password.txt.
3. Set Up Applications
bin/setup-apps
Creates two ArgoCD AppProjects (logical tenants) and two ApplicationSets pointed at the example GitOps repo:
| AppProject | ApplicationSet | Watches |
|---|---|---|
app-cubbychat |
app-cubbychat |
apps/cubbychat/* |
platform |
platform |
platform/* |
ArgoCD scans those directories and creates Applications. They are configured with CreateNamespace=true but not with automated sync — ConfigHub's ArgoCDRenderer bridge requires autosync to be off on imported Applications so it (not ArgoCD) owns the rendered output. Initial bootstrap is done manually or through ConfigHub after import.
4. Install the ConfigHub Worker
CUB_SPACE=<your-space> bin/install-worker
This is the bridge between ArgoCD and ConfigHub. The script:
- Creates a ConfigHub space (if it doesn't exist) and registers a worker in it
- Generates a non-expiring API token for the
confighub-workerArgoCD account - Deploys the worker as a Kubernetes Deployment in the
confighubnamespace, configured with three capabilities: kubernetes— can read cluster resources and apply manifestsargocdrenderer— can query ArgoCD and render application configs into ConfigHubargocdoci— can create Argo CDApplicationresources that deploy rendered manifests from ConfigHub's OCI registry- The worker talks to ArgoCD via internal cluster DNS (
argocd-server.argocd.svc.cluster.local) and calls back to ConfigHub
Because a single worker hosts all three bridges, one target — worker-kubernetes-yaml-cluster — is enough for discovery, rendering, and deployment via cub gitops discover / cub gitops import.
Access
| Resource | URL |
|---|---|
| ArgoCD UI | http://localhost:9080 |
| Username | admin |
| Password | cat var/argocd-admin-password.txt |
To use kubectl directly:
export KUBECONFIG=$PWD/var/gitops-import.kubeconfig
kubectl get applications -n argocd
Importing into ConfigHub
Once the worker is running, you can import these applications into ConfigHub through the UI:
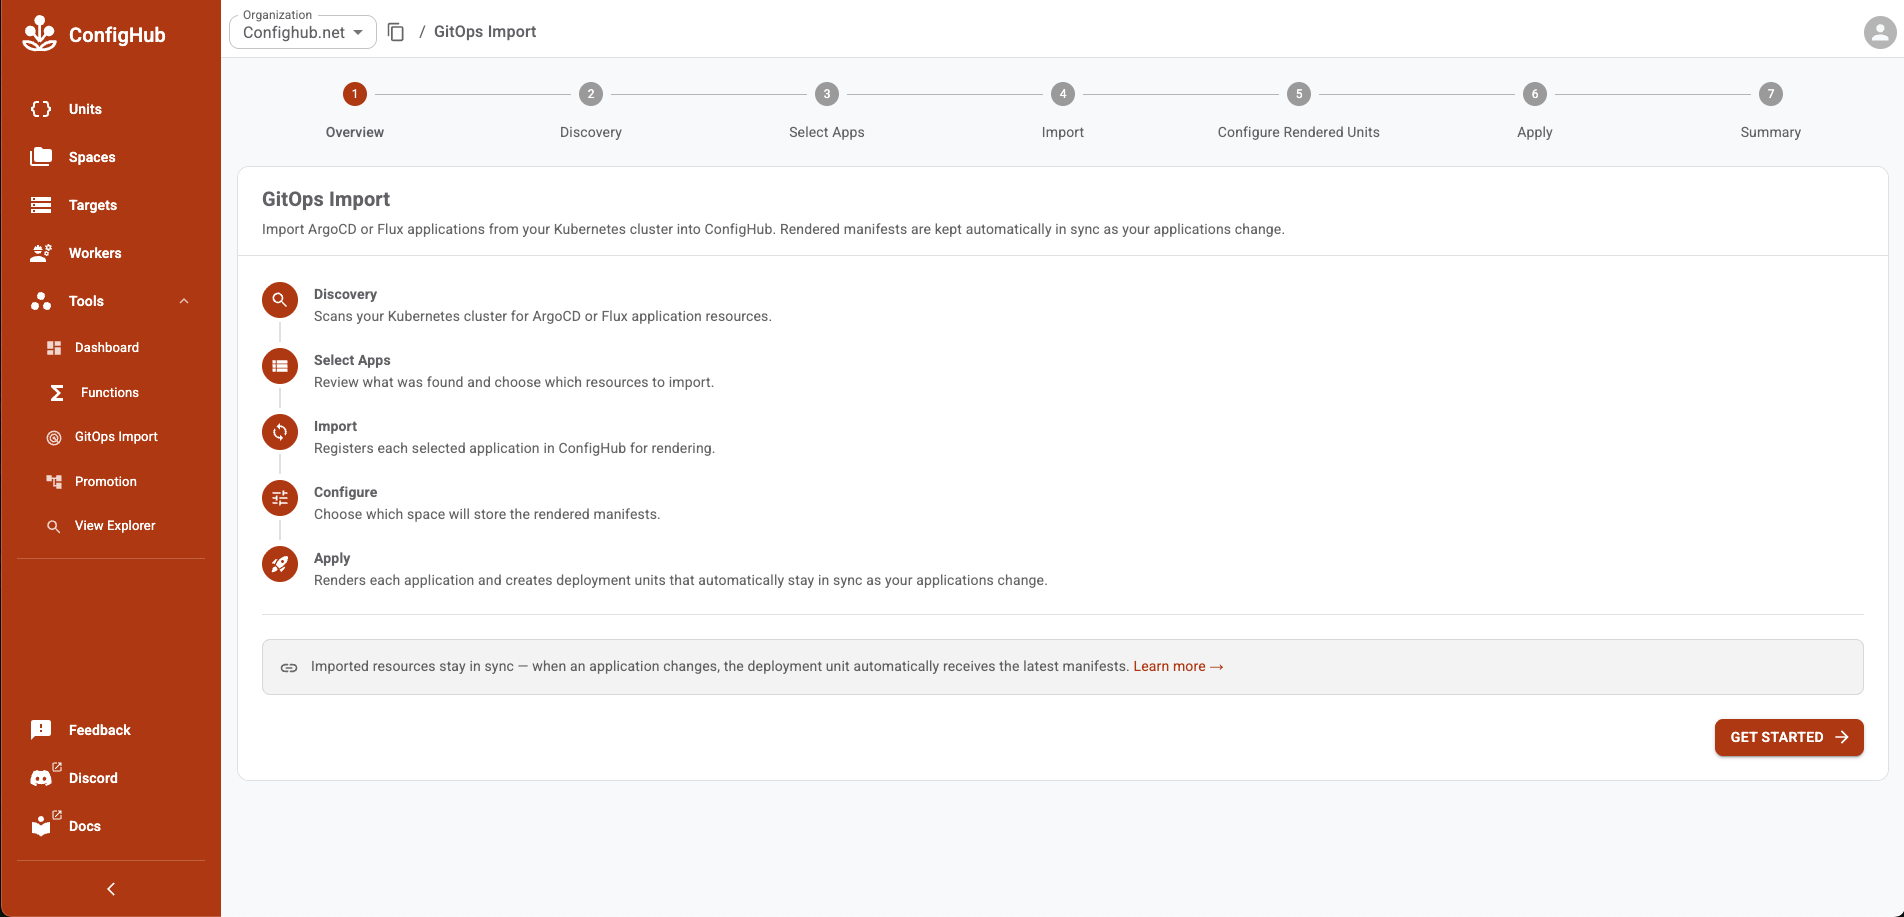
Go to the GitOps Import Link in the app navigation:
 See the overview for an explanation of each step then proceed to the Discovery Step:
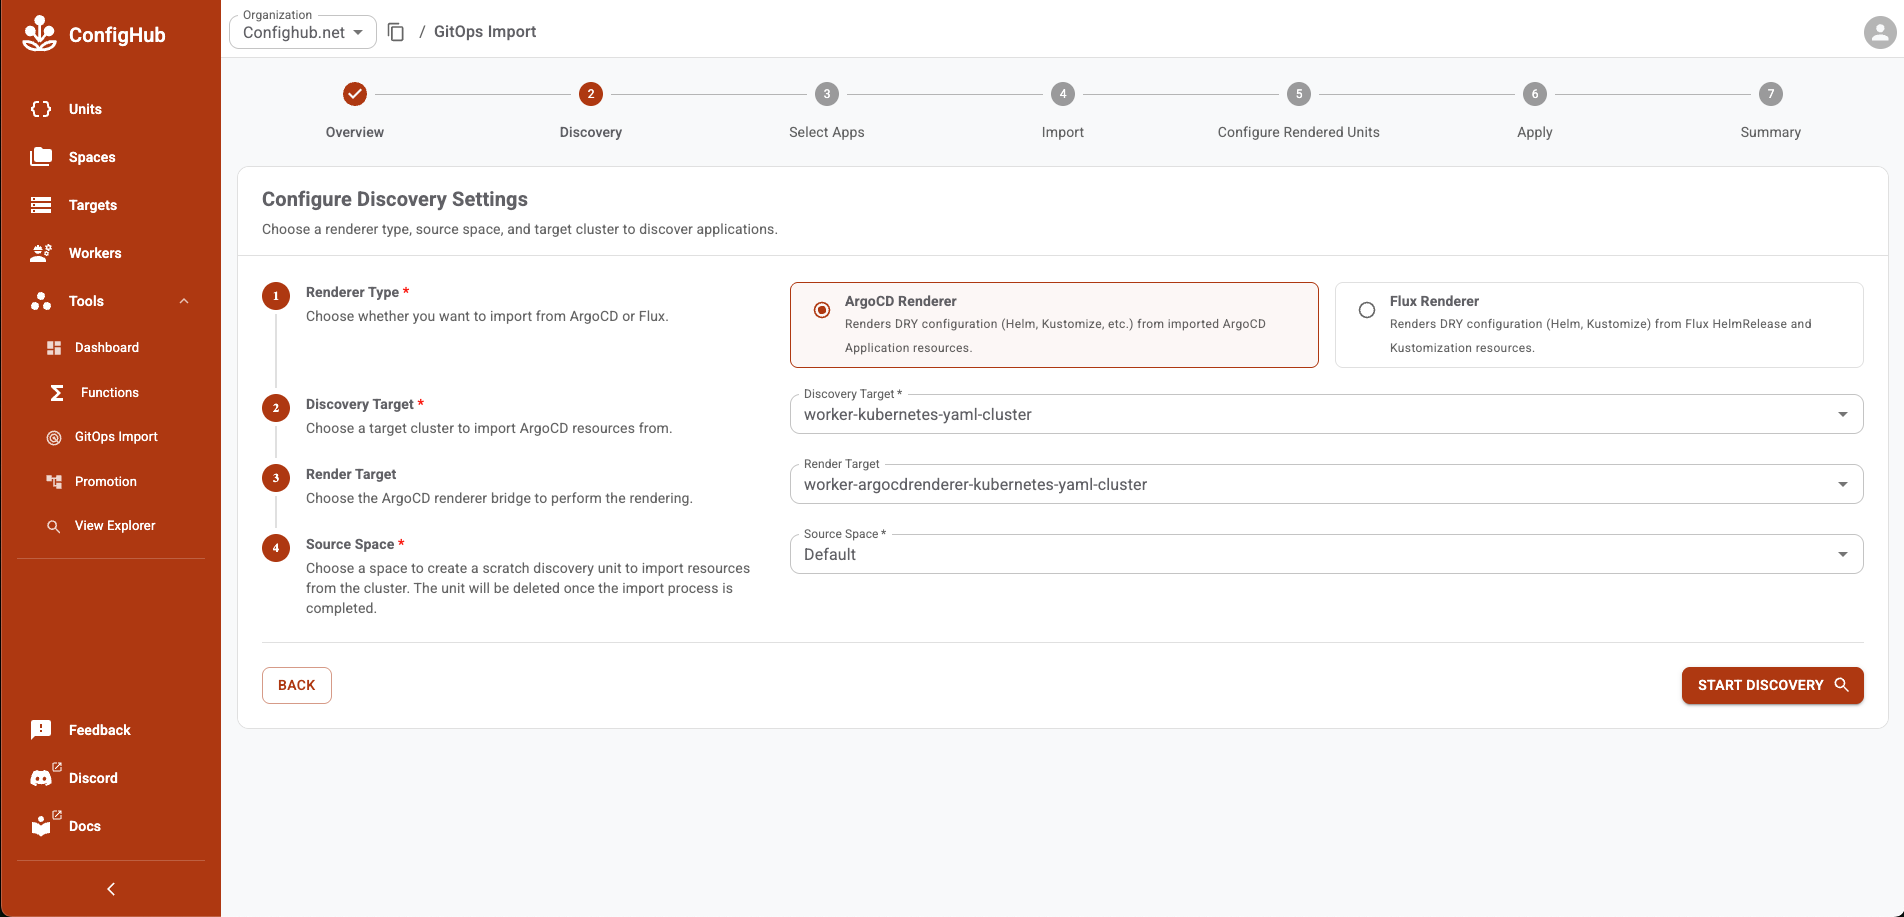
Select ArgoCD Renderer as the import type and choose your discovery target (the kubernetes worker) and render target (the argocdrenderer worker)
The default space is default but you can select another space or create a space on the fly for the temporary ArgoCD discovery unit. Then follow the wizard to bring your ArgoCD applications into ConfigHub:
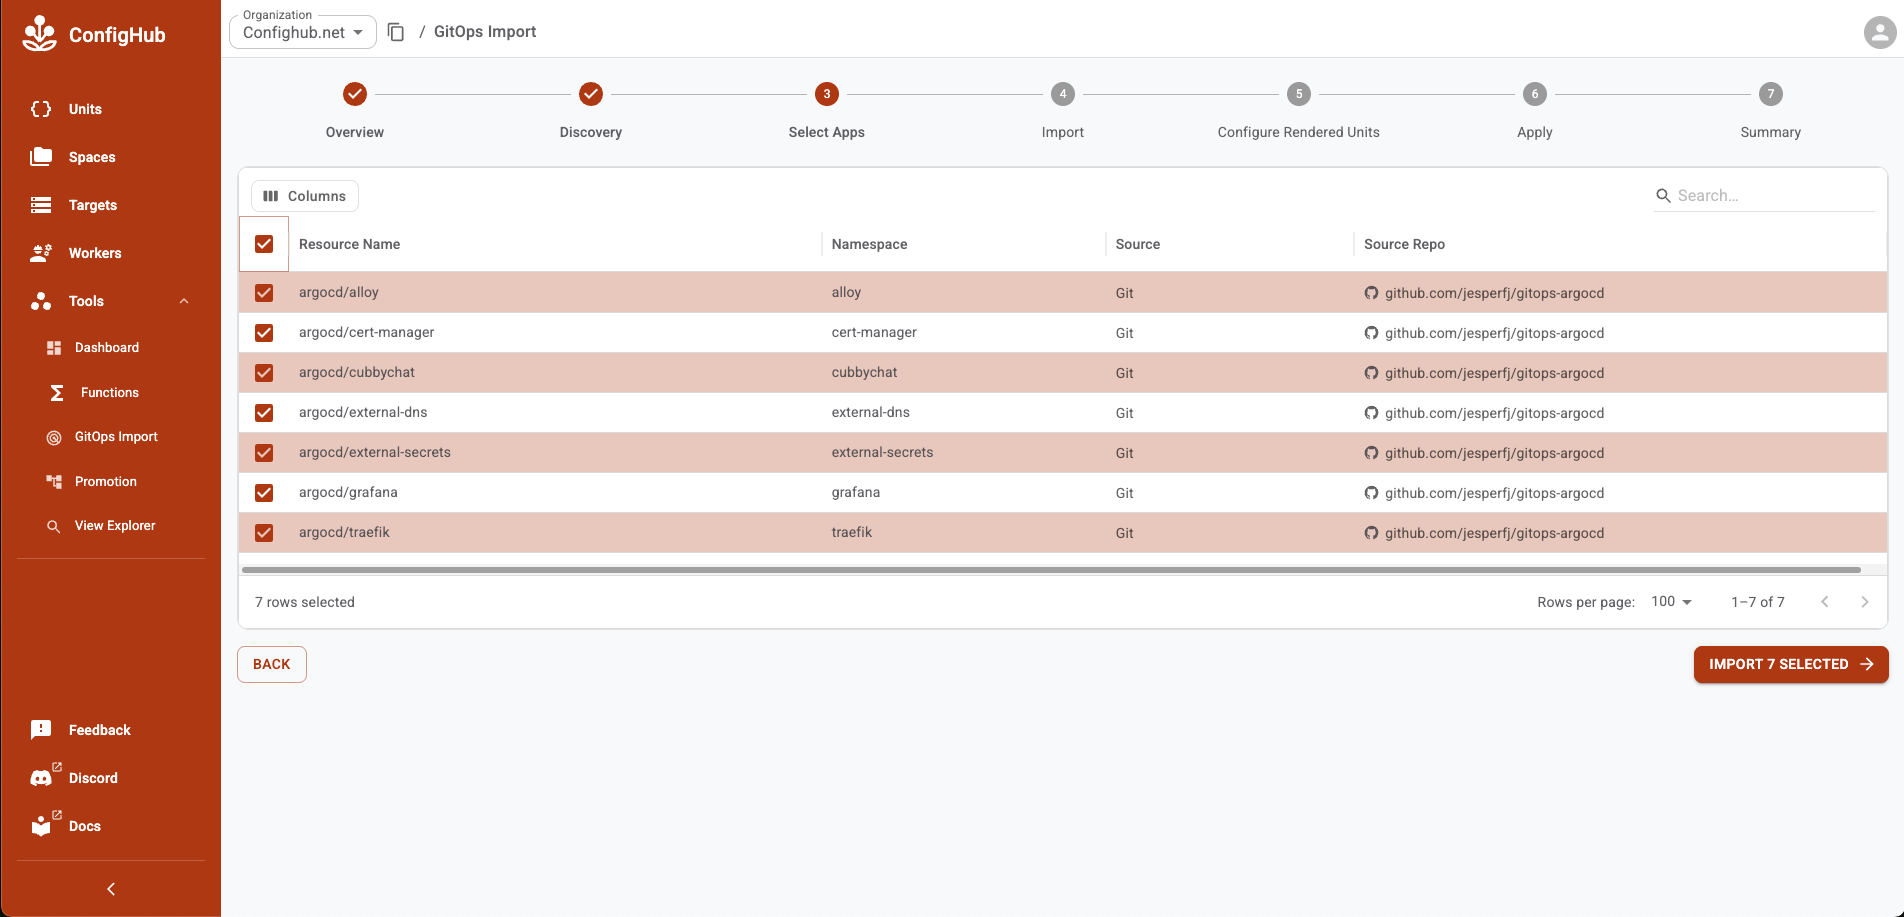
Select the ArgoCD Applications for import:
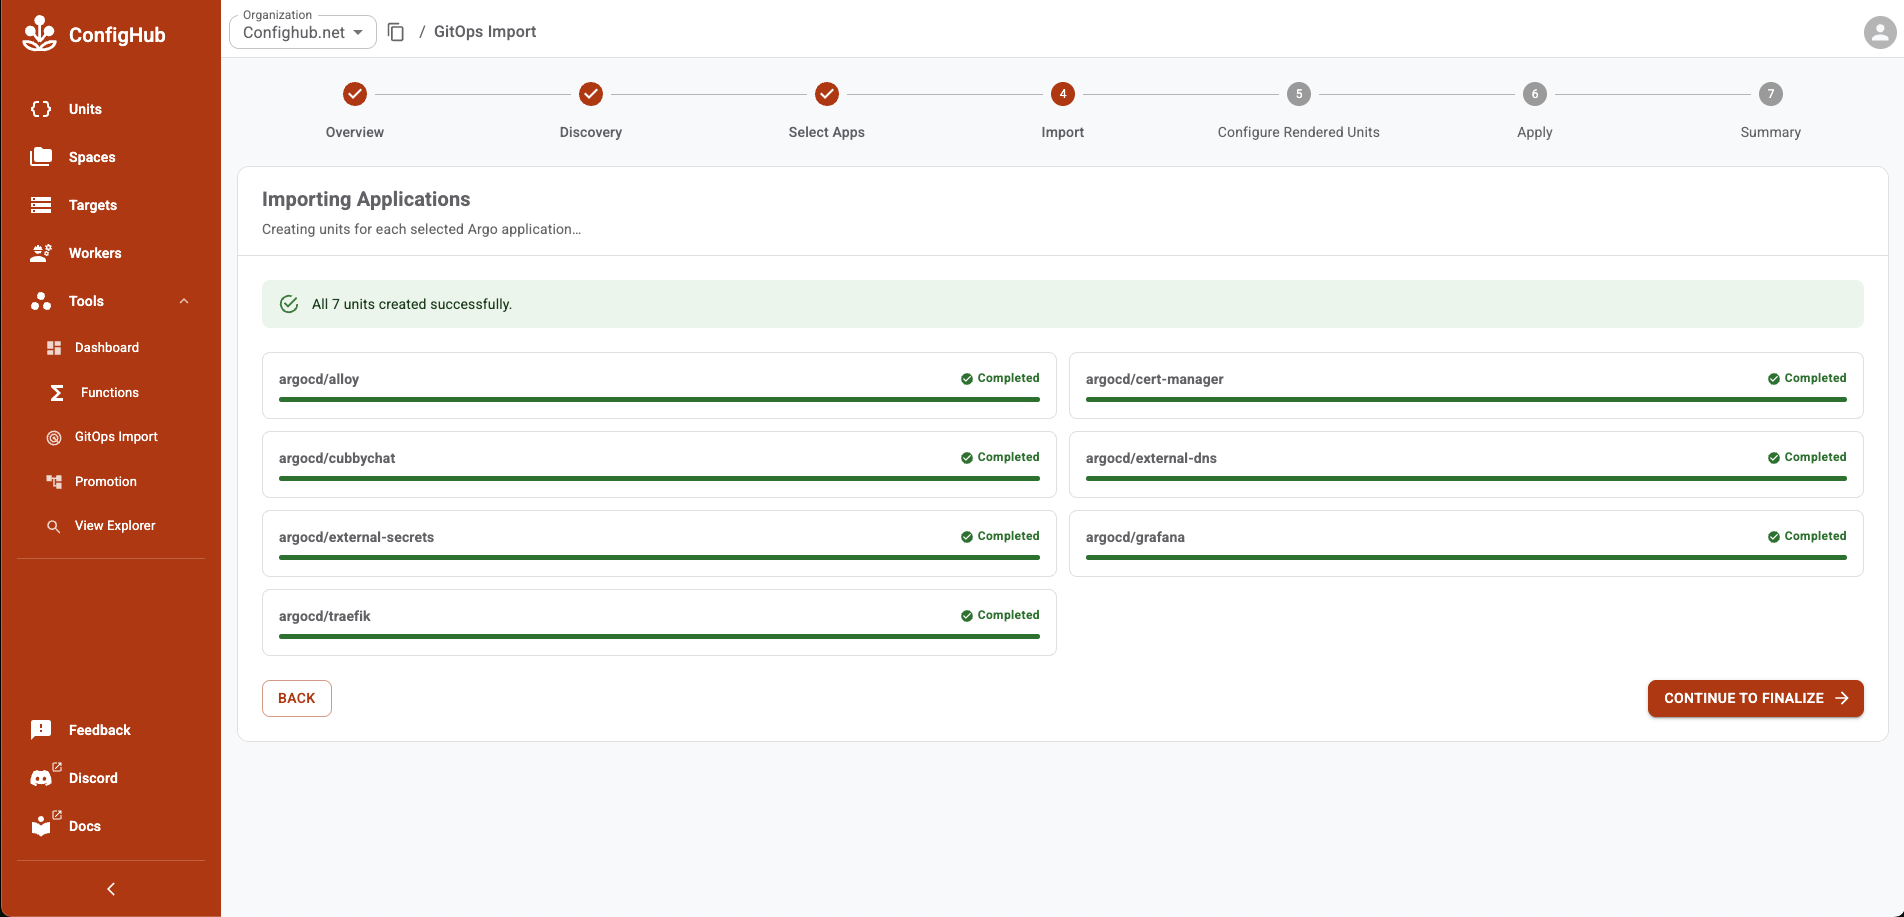
Import the applications:
Start the Configuration Renderering process to create rendered units that will be linked to the dry application units:
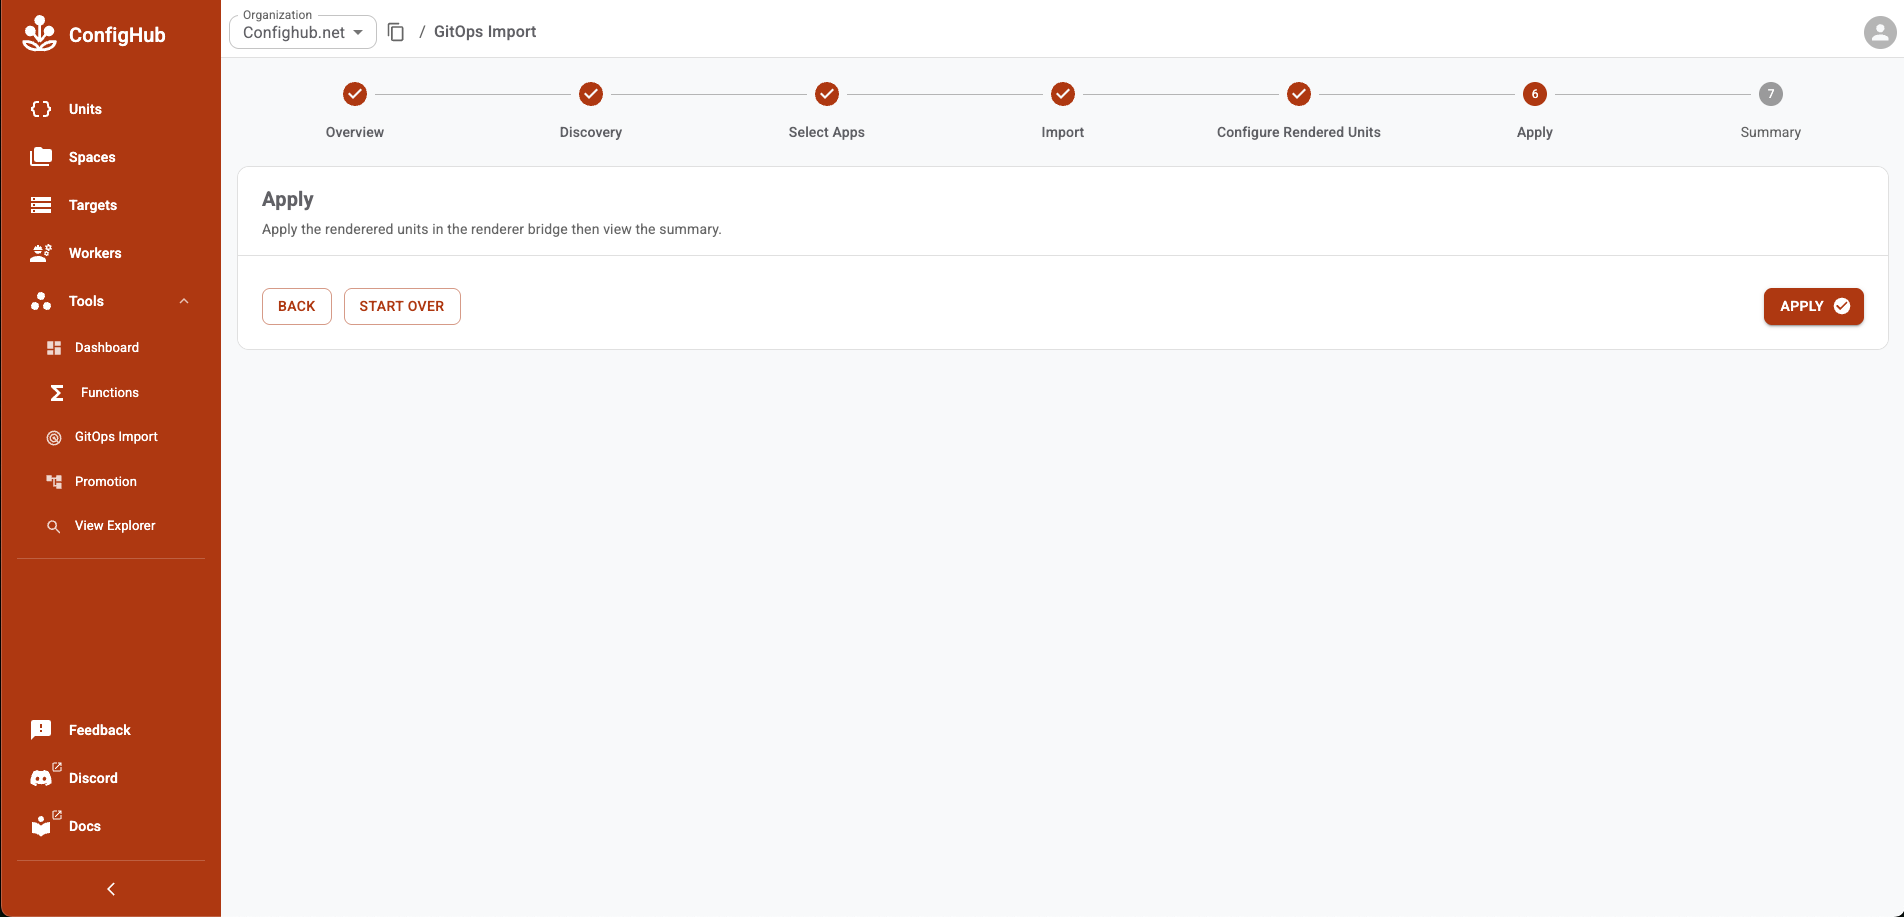
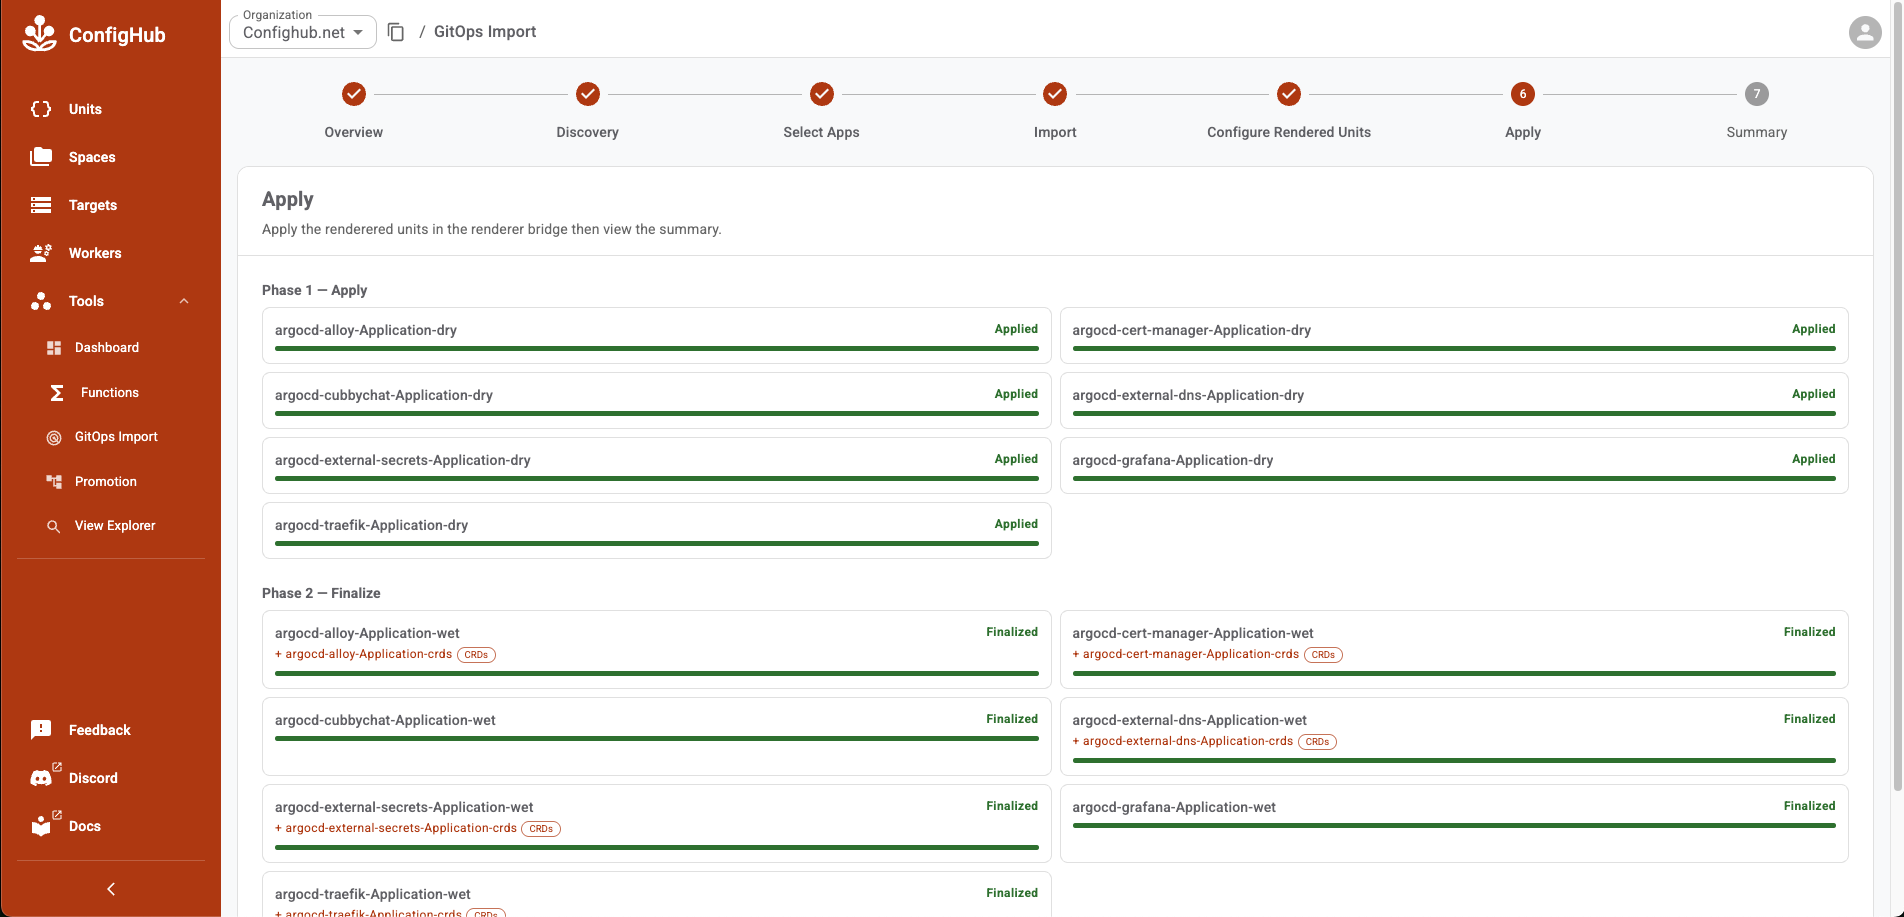
View the apply results:
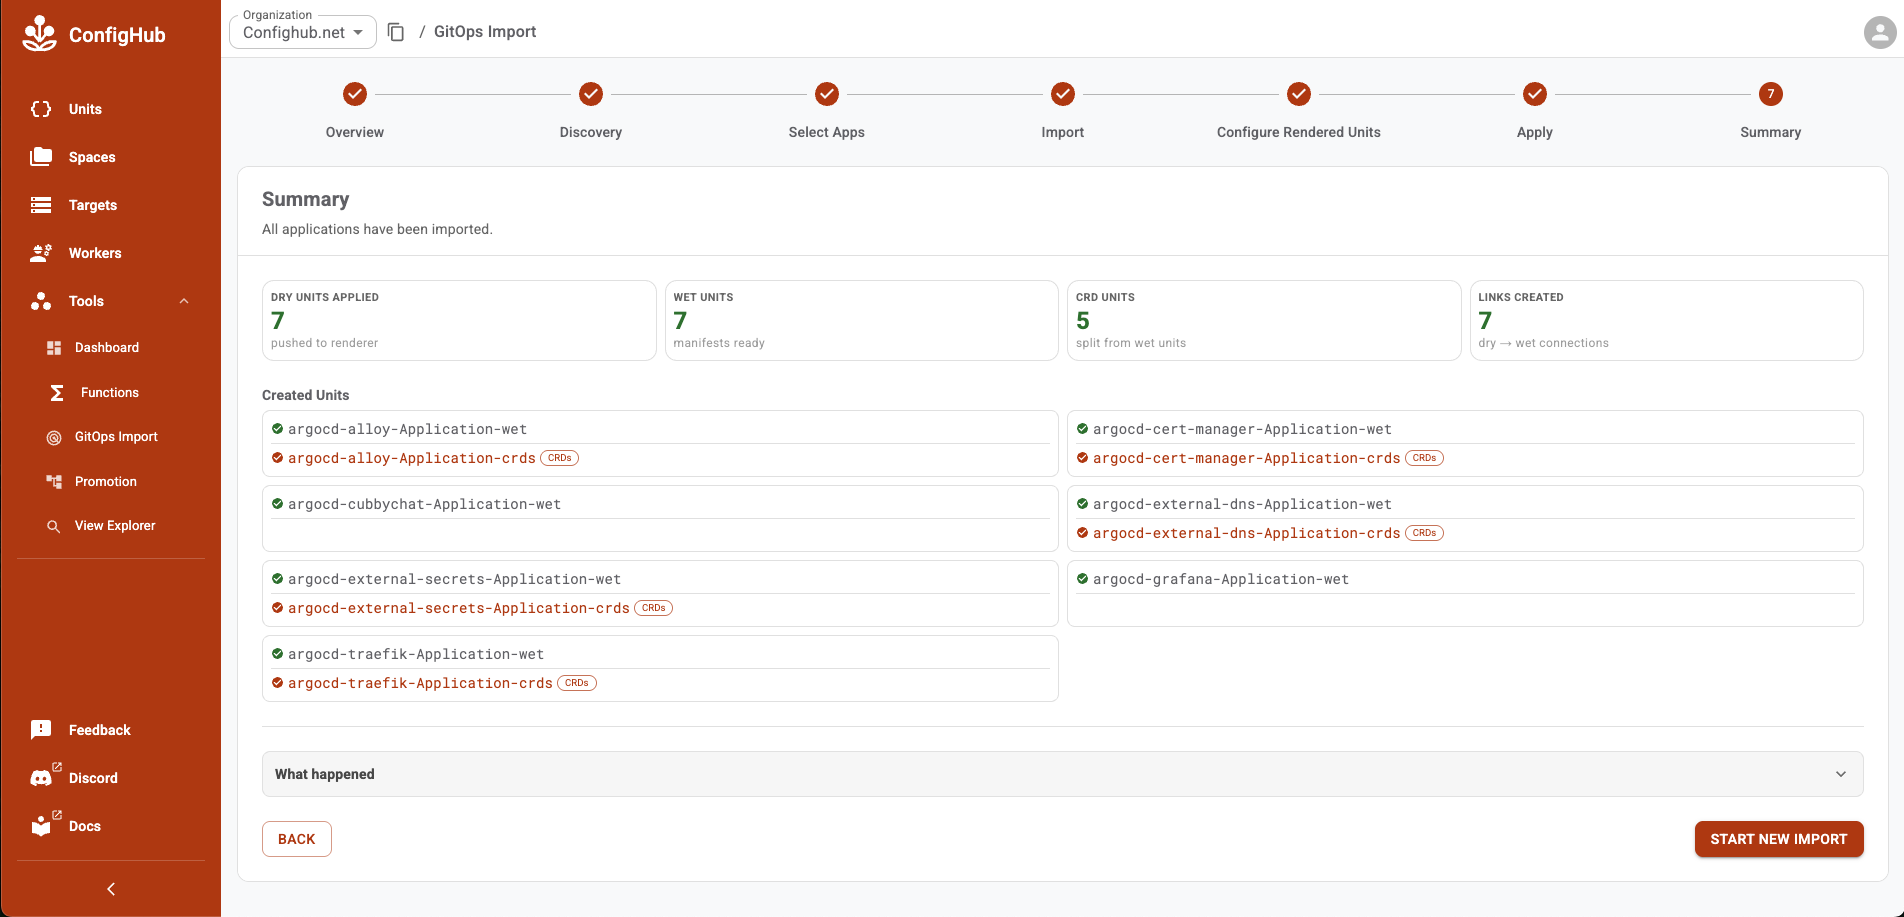
Finally inspect a summary of all units created for the imported applications:
Step by Step Tutorial
Further Reading
- Rendered Manifests — how ConfigHub renders templates like ArgoCD and Helm into live configuration
- Change and Apply Workflow — understanding the apply pipeline used during import
- Create and Manage Workers — setting up and configuring the workers that power GitOps discovery
- Authoring, Migrating, and Importing Configuration — broader guide to bringing existing config into ConfigHub